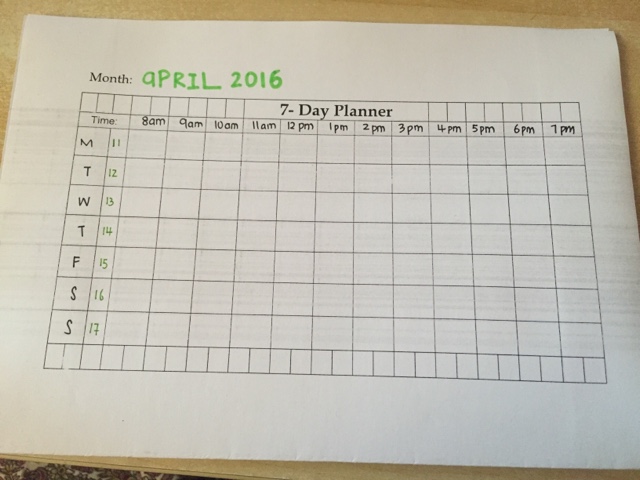
7 Day Weekly Planner Bullet Journal Oraganiser
I love 7-day (weekly) planners. They are a great way of looking at what you have planned at a glance. With this printable template you can customize it to any way you like. This printable is designed for 12-hours of planned activities, but can also accommodate for things which happen outside your 12 hours of planned daily activity.
Here's step-by-step instructions on how you might like to use it. There's plenty of space for creativity and flexibility.
Step 1: Print
Print the planner out on the right size of paper. The most common size is A5. If you don't have A5 paper, you can cut a A4 into half. You can be fancy and print on pretty paper too.
Step 2: Fill in Headers
Step 2.1: Fill in the Month on the top.
Step 2.2: On the first column add in the days of the week. You can start on whichever day you prefer. I've started on Monday here.
Step 2.3: Add in the days of the month in the second column.
Step 2.4: On the time row, add in the 12 consecutive hours you normally have planned activity. I've 8am to 7pm in mine. I would show you in step 4 how I accommodated for an activity ending at 9pm. If you have longer days, you can use the first and last column labelled 'early' and 'late' instead.
 |
| Step 2: Fill in the Headers |
Step 3: Decorate
This is where you can get your creative juices flowing. In this example I've done some colouring in, tape boarders and hand-drawn boarders. You can always use ribbons, stickers, washi tape and any other decorations which you like. Decorating personalizes the planner and make you more committed to use it.
 |
| Step 2: Decorate |
Step 4 - Planning and Organizing
Step 4.1: Plan a system of coloring and shading different types of activities. In my example, I've my key at the bottom.
Step 4.2: Add in all your planned activities. Don't forget to add in things like travel time or meal breaks at work! For activities prior your normal day or last longer than your normal day, you can add in an arrow in and indicate the start or end time. In my example, check out Wednesday at 7pm. Bible study ends at 9pm with the arrow indicated.
 |
| Step 4: Planning and Organising |
Step 5: Install!
So its time to install your weekly planner into your journal. If you are like me and have a book-type journal, just trim down to size and stick down. If you have a fliofax type journal, align the planner into your journal and mark where to punch holes. Every filofax is different and a single hole puncher is very useful for this.
 |
| Step 5: Install |
Enjoy your new organiser!
This template is available on my Etsy Shop:
https://www.etsy.com/au/listing/275544966/a5-bullet-journal-weekly-7-day-planner
Related Posts:
Bullet Journaling Daily Organisation for Middle Management

To subscribe to my blog, please Like on our Facebook page.
To support my blog, please click on one of my sponsor's advertised links :)


Comments
Post a Comment